5 Tips for Better Ice Climbing Images


When it comes to capturing ice climbing images, to me any day out is a good day, although there are definitely a few shortcuts I have discovered over the years that have helped me come away with warm hands and some images that I am proud of. Here are a few things I always consider when spending a day out shooting ice.
1. Safety First
It’s so easy to get hung up on getting a great photograph with good composition, that safety can easily get put on the back burner. So, before you set out to get the shot you are looking for, take your eye from the viewfinder and assess the risks around you. Whether it be the risk of icefall from above or forgetting to rack enough quickdraws to protect the route (I am guilty of both of these infractions) safety has to come first. Making safety your first consideration is not only important for yourself but for your climbing partners as well. It would be devastating if an act of complacency on your part caused the injury of a fellow climber.
2. Plan Your Shot, Pick Your Venue
If you plan to take great ice climbing images, make sure you are in the right location. The first thing I always ask when invited along for a climb is “where are we going and is it a photogenic location?” Now don’t get me wrong, like I said earlier “any day out is a good day”, but if I can help it, I want to be shooting in a location where the ice is aesthetically beautiful. Think tall vertical pillars of ice and amphitheatre-like canyons. These features make for clean compositions that display scale and boldness from your climber. The opposite of this might be a climb that goes from vertical to slab repeatedly. It’s always fun to get out and swing tools, but this type of landscape simply lacks that awe-factor I am looking for when I’m building my portfolio of climbing images.
The last step is to include your climbing partners within your plan. It might seem like you are being a pain to expect others to buy into your day of photography, but I can say that folks are always stoked to be included in the creative process and they are always excited to see the final image of them climbing and looking badass! If people know what you are looking for and are willing to help you capture that shot, the day's objective becomes a team effort and it makes everyone feel stoked when the day’s work results in a compelling image.
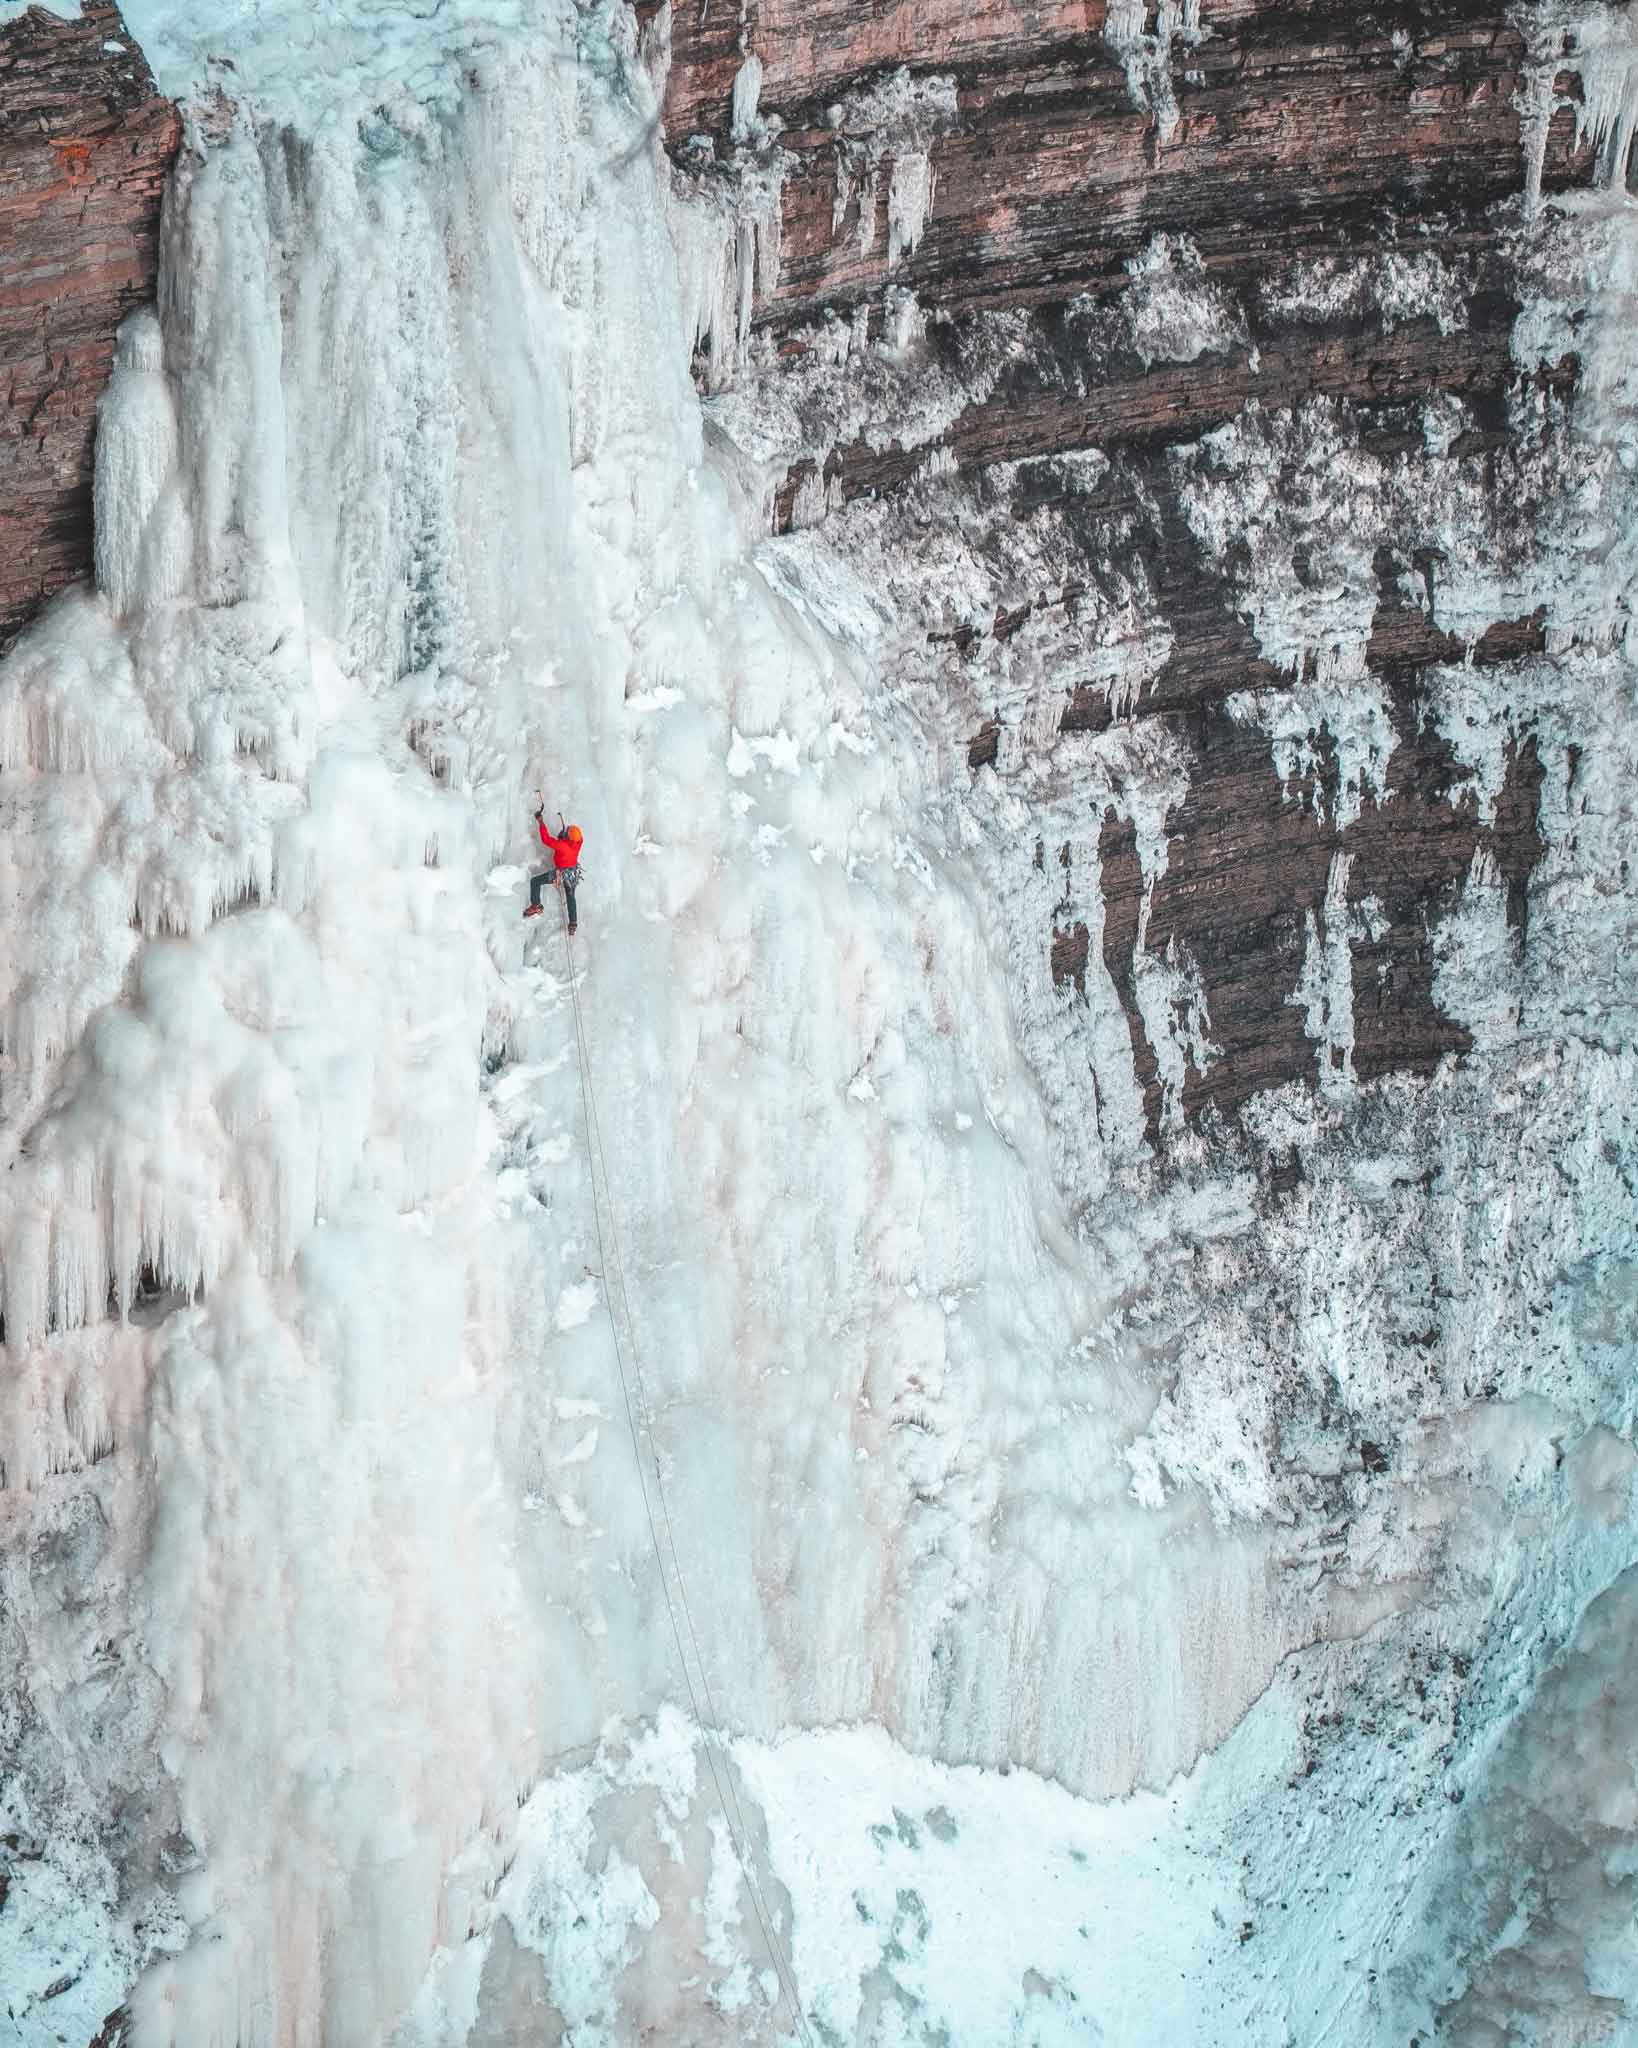
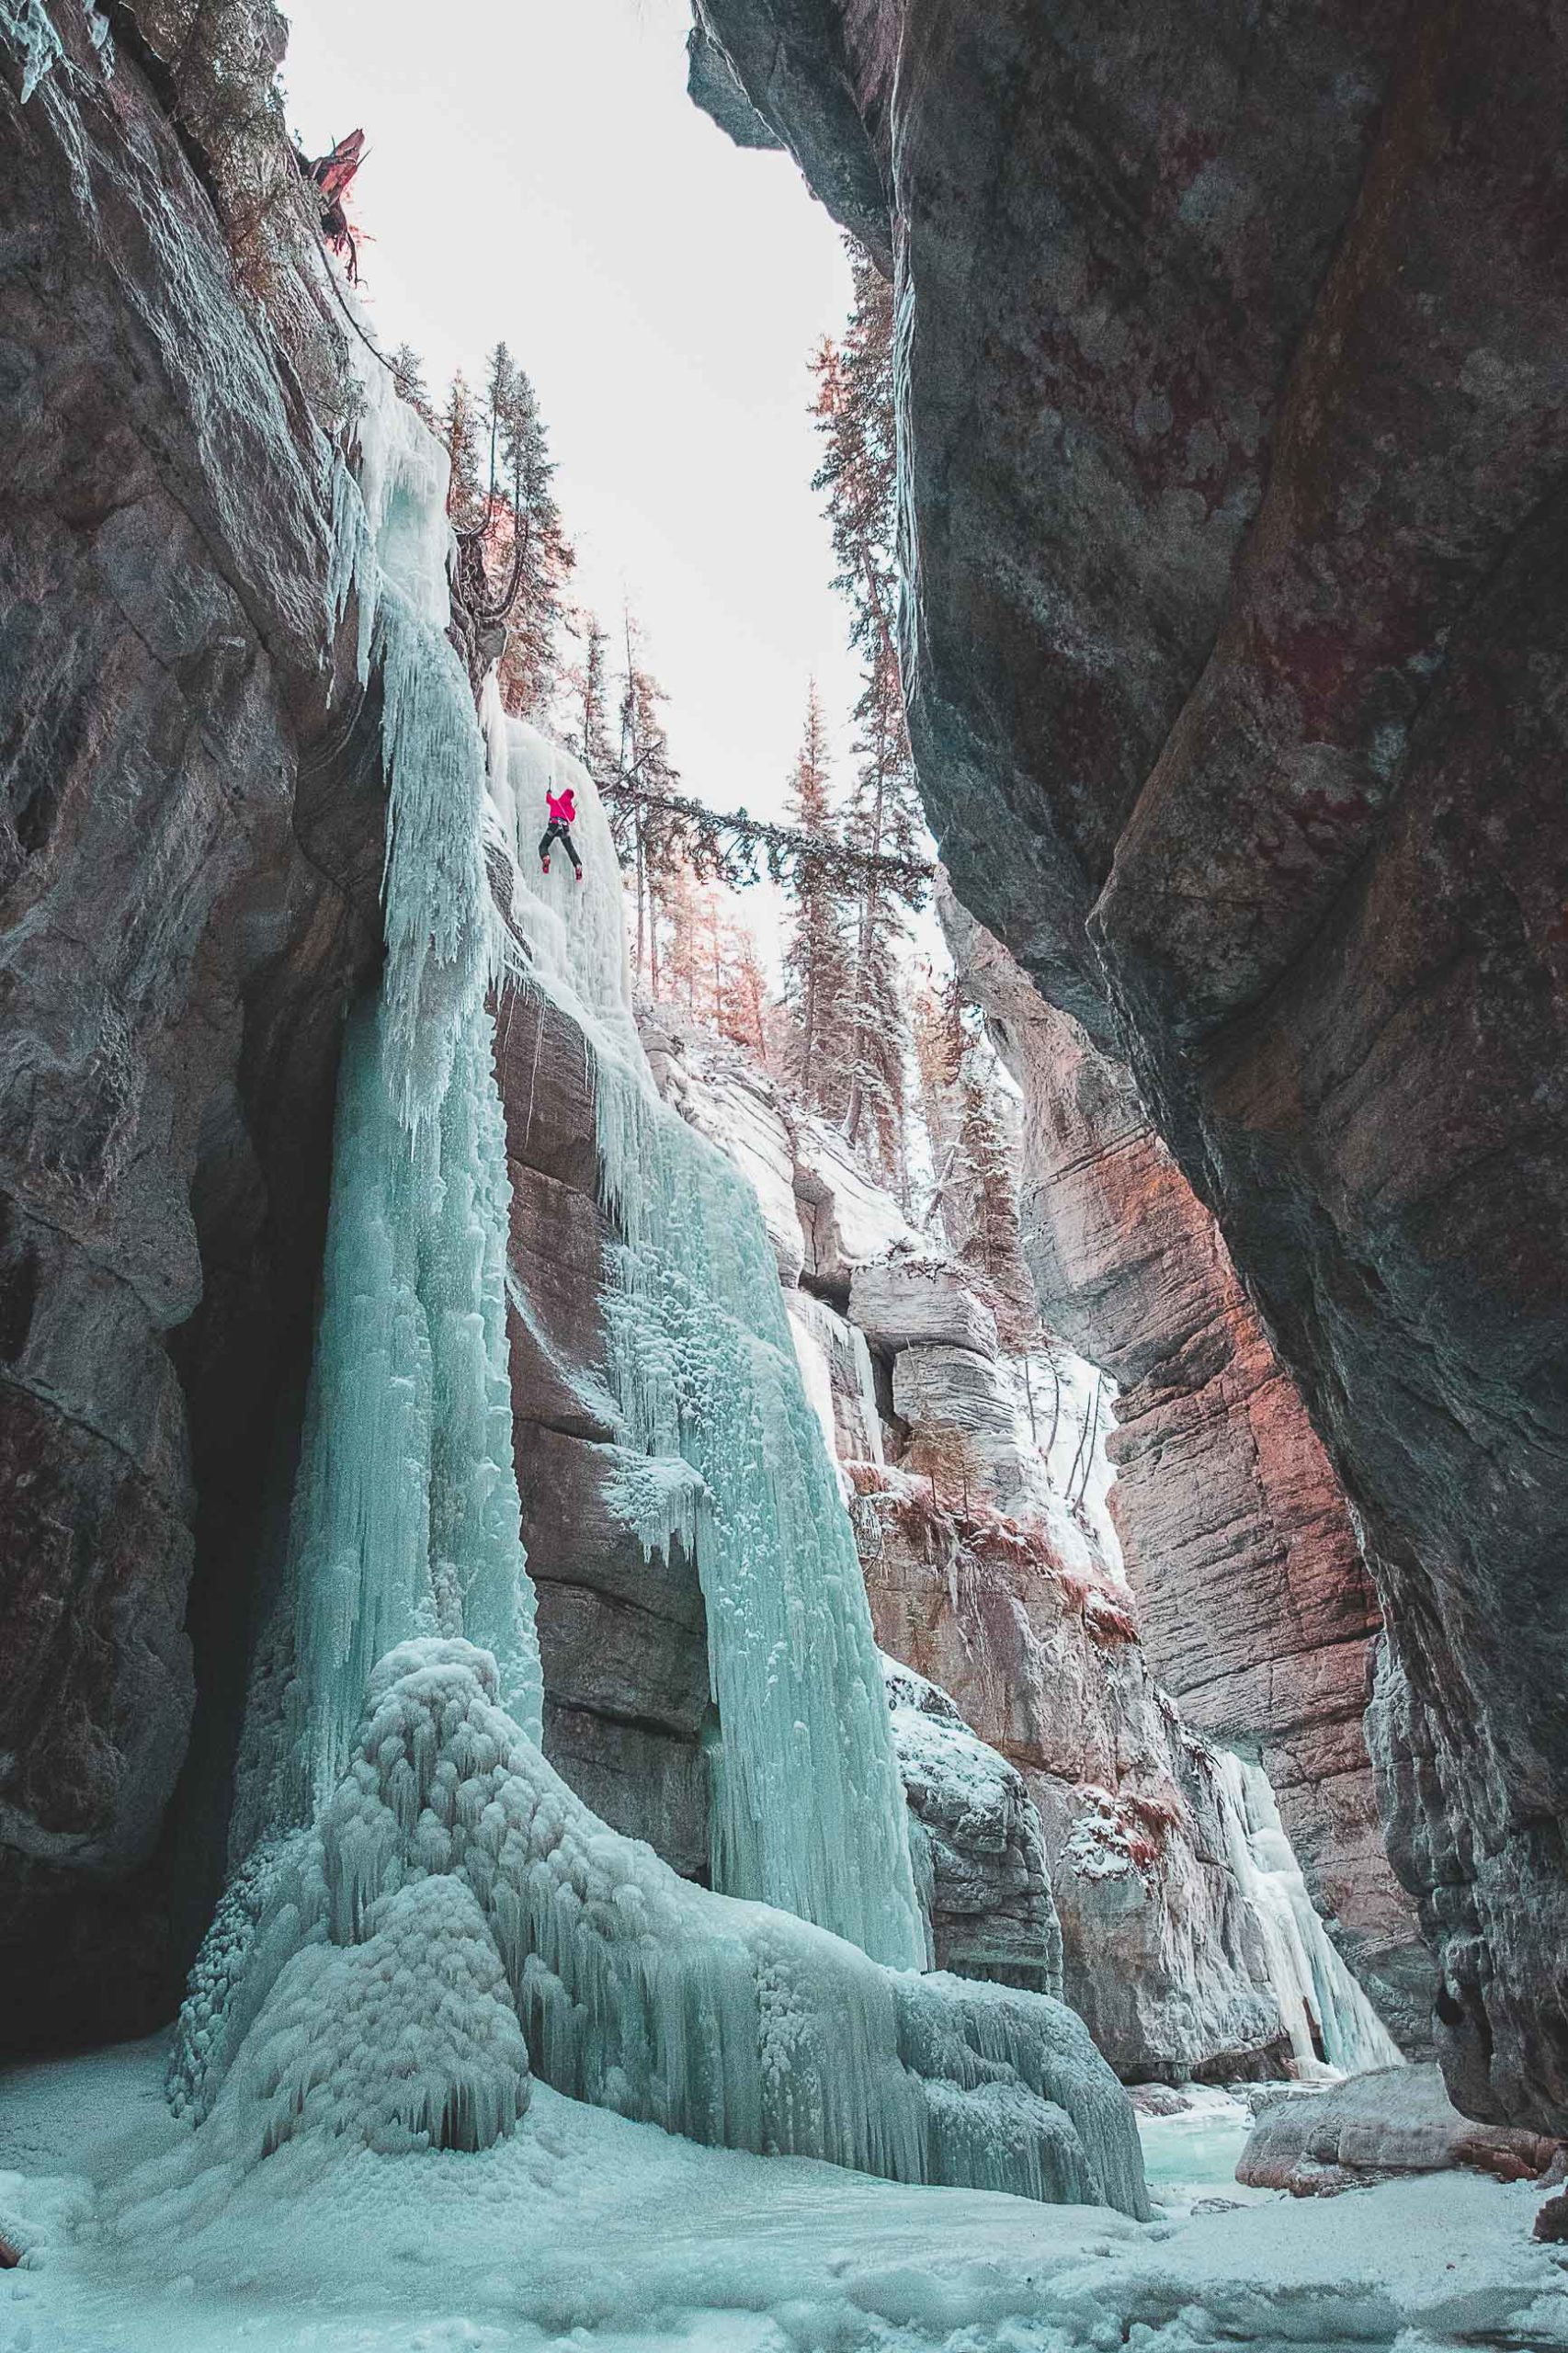
3. Step Back for Scale
When it comes to climbing photography, people often think they need to be hanging in a precarious position in order to capture the best image. It is true that the top down shot of a climber moving through the crux, the hardest part of the climb, is striking, but there are other compositions that also work well. What I often try to do is get a pulled-back shot of the climber on the route. This shot not only has a different composition, but it often shows the grandiose nature of the climb by giving the viewer a sense of scale. It's always awe-inspiring to see a little orange dot high up on a magnificent pillar of ice.
4. Bad Weather is Your Best Friend
Though it seems counterintuitive, I find the best days for shooting are the when the weather is nasty. First of all, bad weather makes for even light. When the skies are overcast and it’s blowing snow, the light is softer, diffused and easier to work with than a harsh midday sun. Rather than planning to be out for only a few hours in the morning or evening when the light is even, I can shoot all day and not have to worry about the bright sun ruining my images. Another reason I love shooting in inclement weather is that it brings an element of mood or drama to ice climbing images that a sunny day couldn’t. When the snow blows and the spindrifts hit the climber, things just look more raw.
5. Bring the Right Gear
The right gear will help you get the shots you came for. Although cameras and lenses are important, there are other things I bring to help facilitate my needs. I make sure I have them all before I leave the house. First is extra batteries for my camera. If things get cold, batteries are bound to perform poorer than average, meaning you get less shots per battery. The second thing is hand warmers, I bring a few packs for not only my fingers, but also my camera gear. Often, when it gets super cold, I will throw a few into the compartment that houses my batteries and other components. Third is a satellite messaging device. These are invaluable if you or a climber gets hurt in an area where cell service is limited, and in today's market these devices are relatively cheap to purchase and operate. Last, but definitely not least, I always bring multiple pairs of thin gloves over one thick pair. I do this for two reasons: no matter what, gloves get wet over time so changing them out keeps your hands warm and dry. Secondly, and most importantly, thin gloves allow me the dexterity to run my camera without sacrificing the ability to change settings on the fly and potentially miss a shot. There are even gloves these days that allow you to use touch screen without taking the gloves off. With camera technology moving in this direction, there is definitely an advantage to picking up a few pairs of these beauties.
It has been only through time in the field that I have learned how to get the most out of a day of photographing ice climbing. In saying that I hope that these few tips can help folks to spend more time enjoying shooting ice climbing images and less time contemplating composition, planning, and packing.